
Appearance
Welcome to Biponix
Biponix helps you sell your products online.
You add your products, customers find them and place orders, and you take the payment and send the parcel. All of it happens in one place, which you can open from your phone or your computer.
There is nothing to install, and you do not need any computer skills. If you can use Facebook, you can use Biponix.
This guide takes you from your first day to a shop that runs smoothly. Take it slowly — you do not need to understand everything at once, and almost anything you set up today can be changed later.
The two parts of your store
This is the one idea worth learning first, because most of your questions later will depend on it.
Your storefront is the shop your customers see. It has its own web address and its own look. When someone browses your products, adds one to a basket and pays, they are on your storefront.
Your dashboard is your own private area, for you and the people you invite. This is where you add products, watch orders arrive, change prices and check your sales. Customers can never get in.
We use these two words all through this guide. Your store means both of them together.
What you can do
- Sell online. Your storefront stays open day and night, whether you are awake or not.
- Sell in person. A built-in counter lets you serve a customer standing in front of you. It uses the same products and stock as your online shop, so the two never disagree.
- Take orders, payments and deliveries. Orders arrive in one list, and you book the parcel without copying addresses by hand.
- Watch your stock. See what is running low, before someone orders what you cannot send.
- Run offers. Discount codes, price cuts, and small sale pages you can share.
- Change how your shop looks. Choose a design, add your logo and colours, write your own pages.
Which payment methods and delivery companies you can use is covered later, on their own pages.
How to get a store
Biponix is new, and still in early access. That means you cannot open a store on your own yet — someone from the Biponix team sets it up with you. Most merchants find this easier, because the fussy first-time setup is done for them.
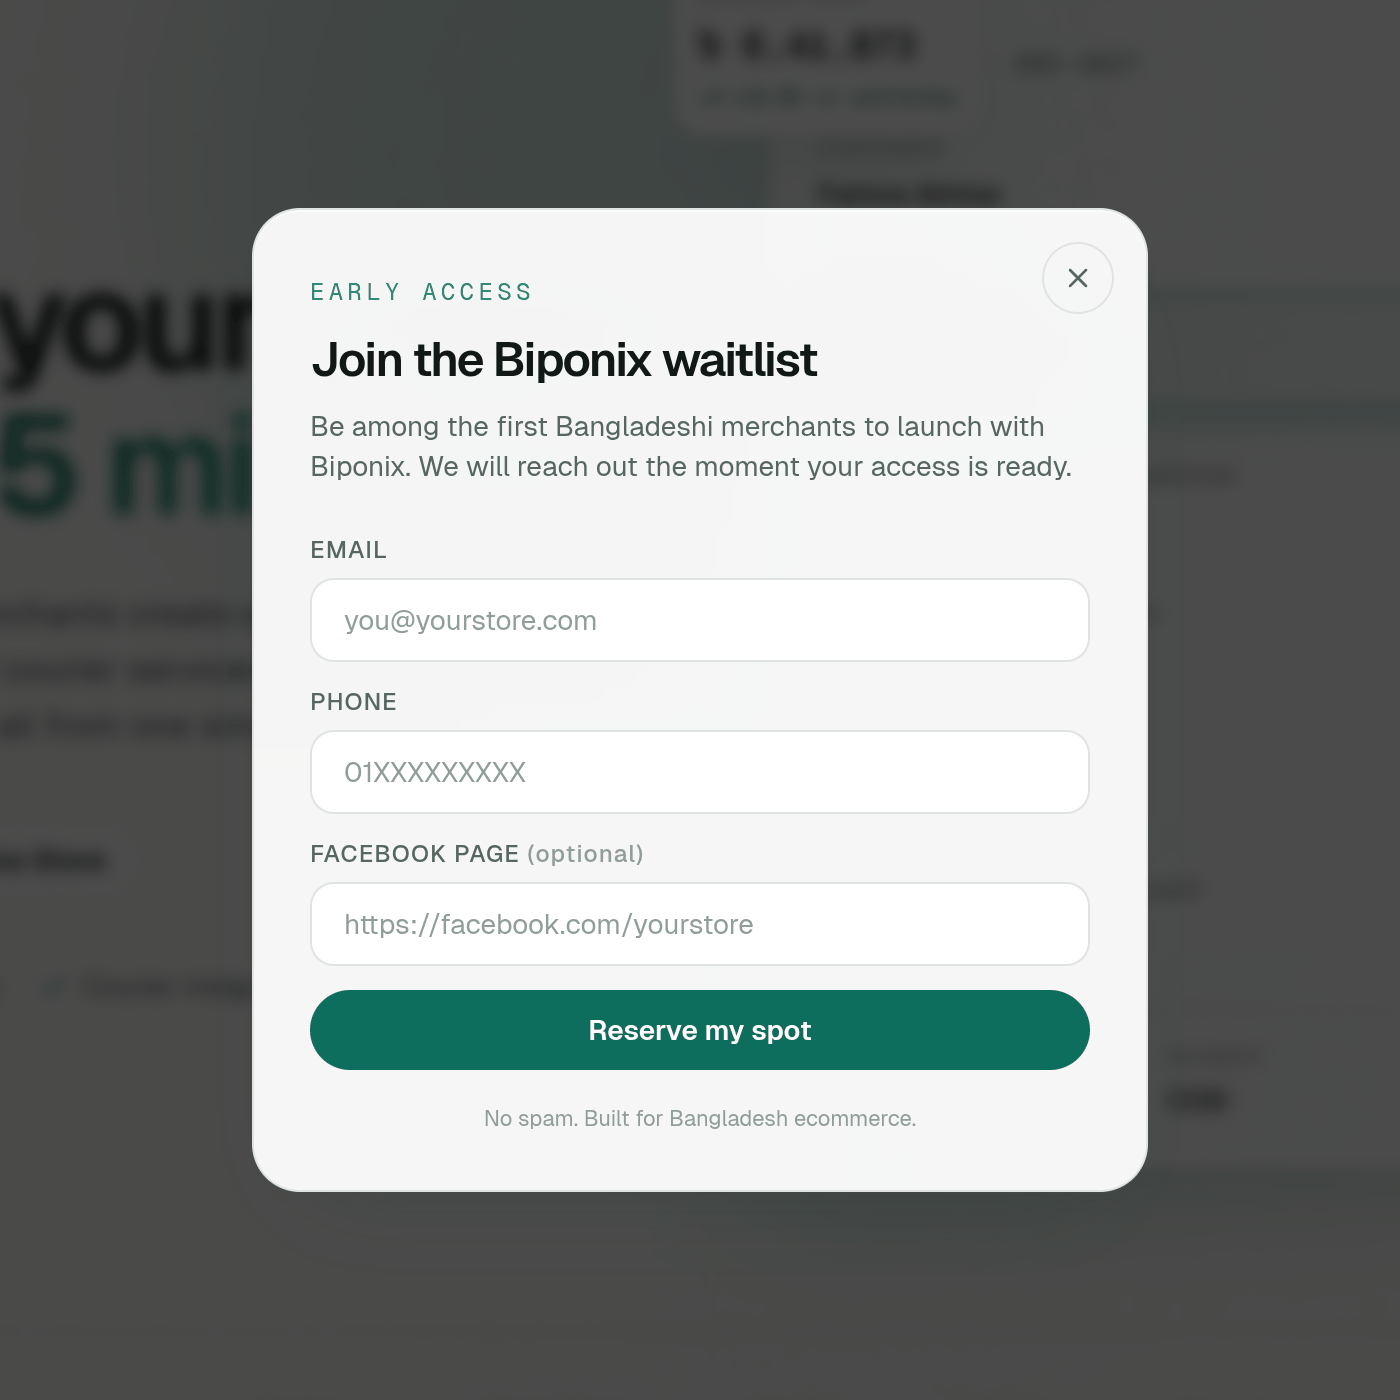
- Go to biponix.com and open the waitlist form. The buttons that open it are called Start Free and Become an Early Merchant.
- Fill in your email and phone number. If you already sell through a Facebook page, add its link too. That part is optional, but it helps the team understand your business before they call you.
- Press Reserve my spot.
- The Biponix team contacts you once your access is ready, and sets your store up.
- You get an invitation email. That email is what lets you into your dashboard.
Getting into your dashboard
When your invitation email arrives, click the link inside it and choose your own password. Nobody else picks it for you — not the Biponix team, and not the owner of the store.
Invitation links last 7 days
If yours has stopped working, it has passed its seven days. Just ask whoever invited you to send a new one. There is no need to feel awkward about asking.
After that, you sign in with your password and either your email address or your phone number. If you help run more than one shop, you choose which one to open after you sign in.
Your first day walks you through all of this, step by step.
A quick tour of your dashboard
The menu runs down the left side of your screen, and stays there while you work. It comes in groups, and those groups are worth learning early, because they match the way the work divides up.
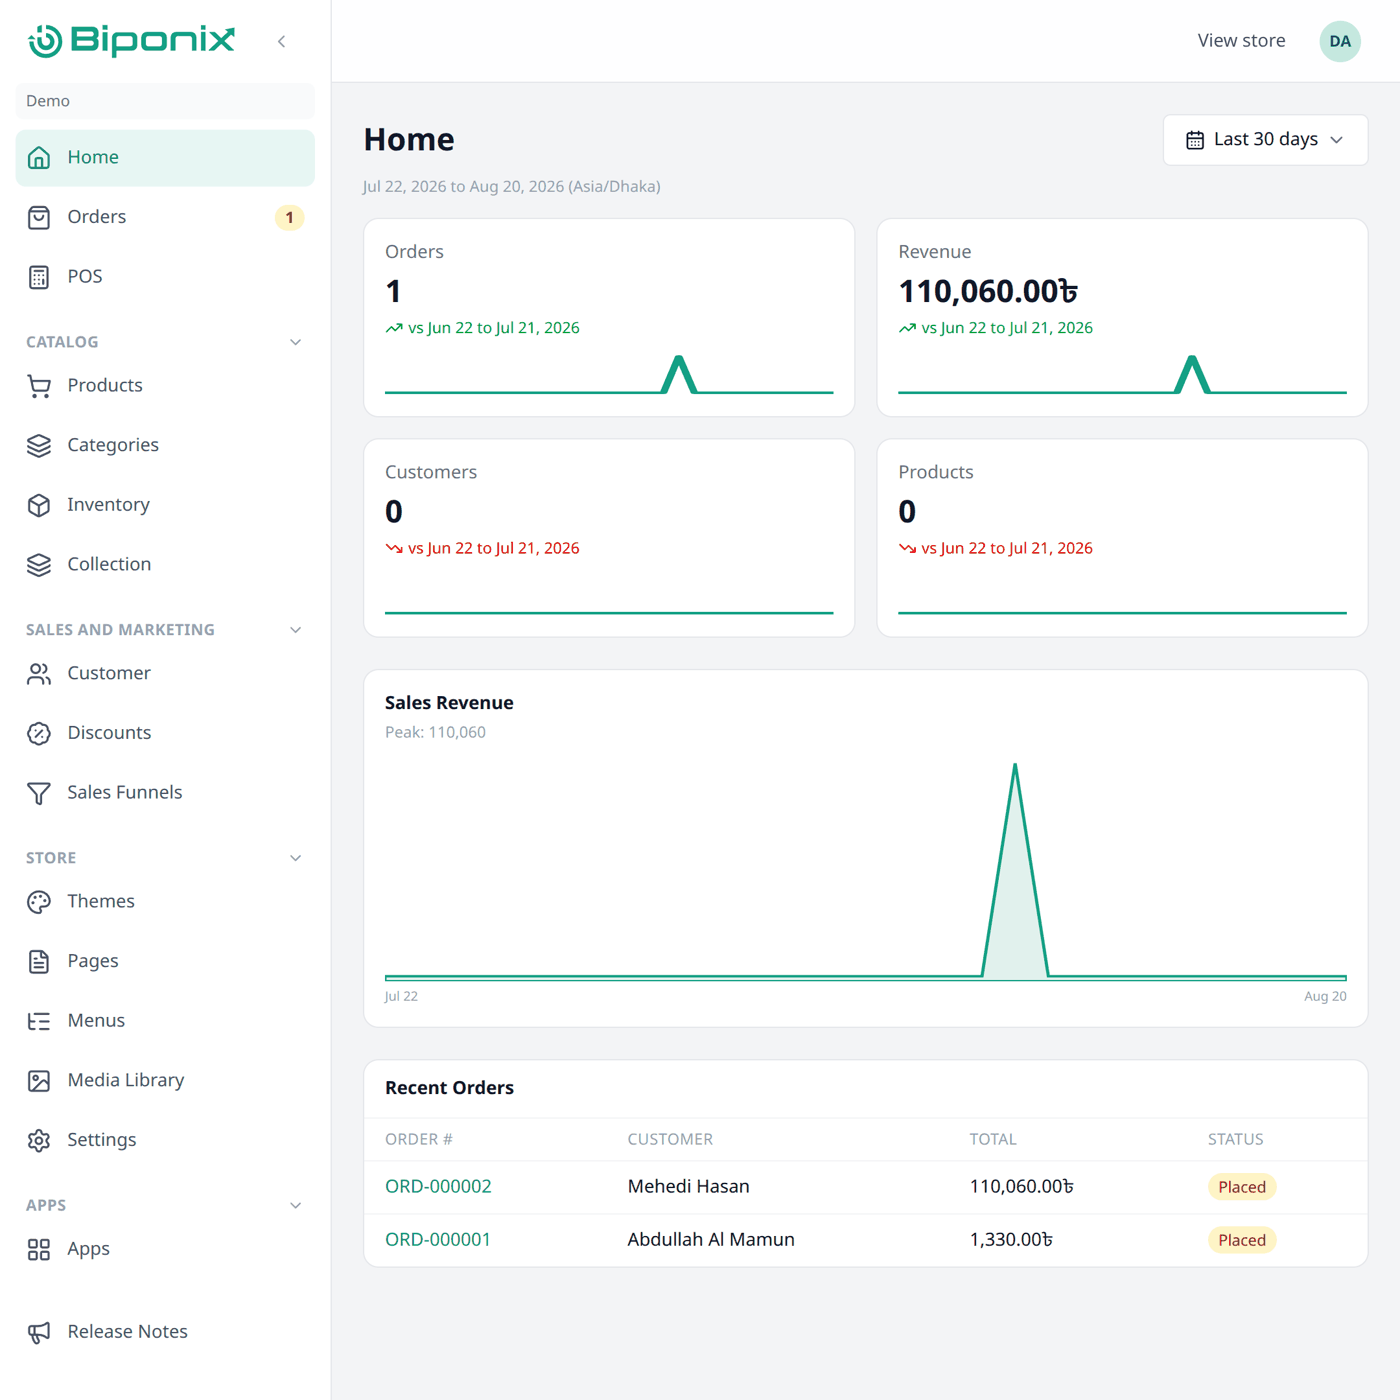
At the top
| Menu item | What it is for |
|---|---|
| Home | Your sales and order numbers at a glance. |
| Orders | Every order your customers have placed. |
| POS | Your counter for selling face to face. |
Catalog — the things you sell
| Menu item | What it is for |
|---|---|
| Products | Everything you sell, with photos and prices. |
| Categories | Products of the same type, grouped so shoppers can browse. |
| Inventory | How much stock you have left. |
| Collection | Product groups you make yourself, like "Eid Offers". |
Sales and Marketing — bringing people in
| Menu item | What it is for |
|---|---|
| Customer | The people who have bought from you. |
| Discounts | Codes your customers type at checkout to get money off. |
| Sales Funnels | A single page for one offer, with a link you can share. |
Store — how your shop looks
| Menu item | What it is for |
|---|---|
| Themes | The design of your storefront. |
| Pages | Your own pages, like About Us or Delivery Information. |
| Menus | The links around your storefront. |
| Media Library | All your pictures, in one place. |
| Settings | The things you set once. |
Apps is where you add the services your shop connects to — including the ways customers pay you and the delivery companies that carry your parcels. Release Notes tells you what has changed in Biponix.
Each of these has its own page later in this guide, so there is no need to learn them now.
What is in Settings
Most of your first week happens in Settings. It comes in groups:
- Store — General, Brand: your shop's details, logo and colours.
- Commerce — Payments, Checkout, Shipping & delivery: how customers pay you, and what delivery costs.
- Communication — Notifications: the messages sent to customers and staff.
- Growth — Analytics & tracking, SEO: where your visitors come from, and Google search.
- Team — Members, Pending invitations: who else can get into your dashboard.
Where to start
If your store is new, do these in order. Each one has its own page in this guide.
- Store details — your shop's name, address and contact details.
- Brand — your logo and your colours.
- Payments — so customers can actually pay you.
- Shipping & delivery — so their orders can reach them.
- Checkout — what the last step of buying looks like.
- Notifications — the messages that go out when an order arrives.
After that comes the part you have been waiting for: putting your products up.
Following this order means that by the time your first product is there, everything behind it already works.
Using this guide
If you are new, read from the start and follow the steps in order. This guide is one path rather than a reference book, so it assumes you have not done any of this before.
If you just need one thing, open the page named after the menu item you are looking at — the guide is arranged the same way as your dashboard. And if anything here does not match your screen, trust your screen and tell us. Biponix grows quickly, and this guide grows with it.