
Appearance
Shipment
Once an order is confirmed, a Shipments panel appears on its form, below the items you already know from Order processing. This is where you manage the shipments for the order.
Creating a shipment
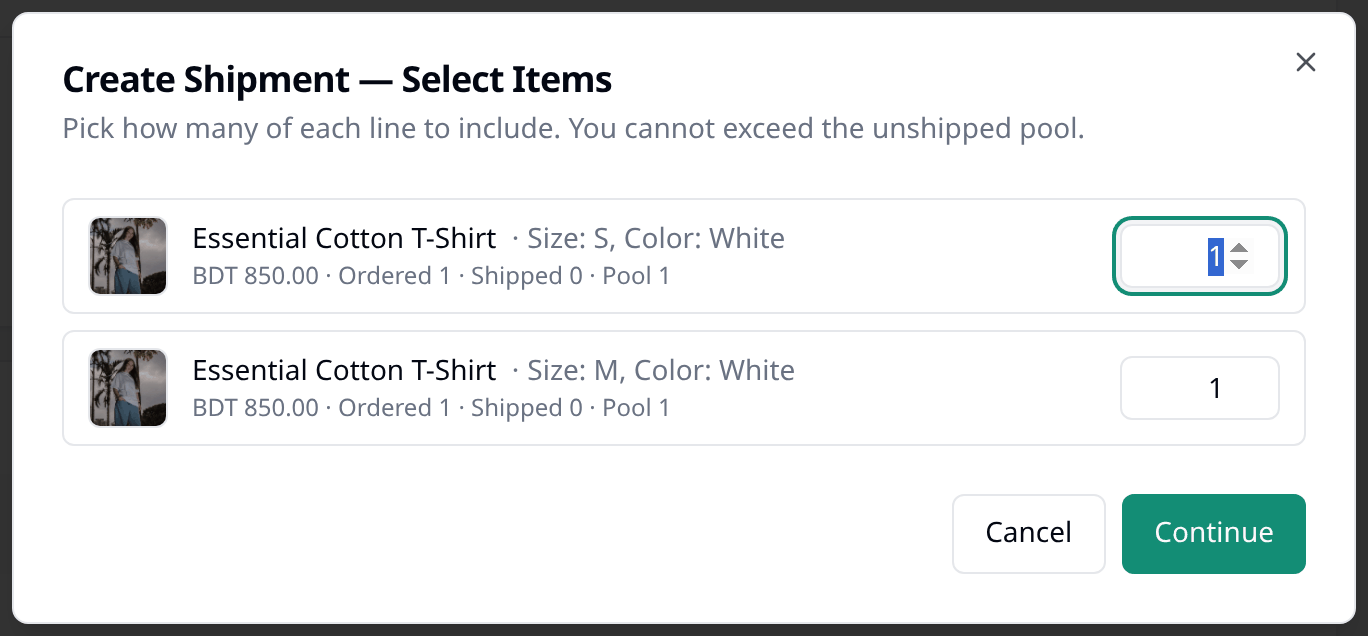
Press Create Shipment to open a short, three-step form. An order does not have to go out in one shipment — you can send it in parts if you need to.
Pick what to send. Every item on the order is listed with a box beside it — type how many to send this time. It starts already filled in with what is left to ship.
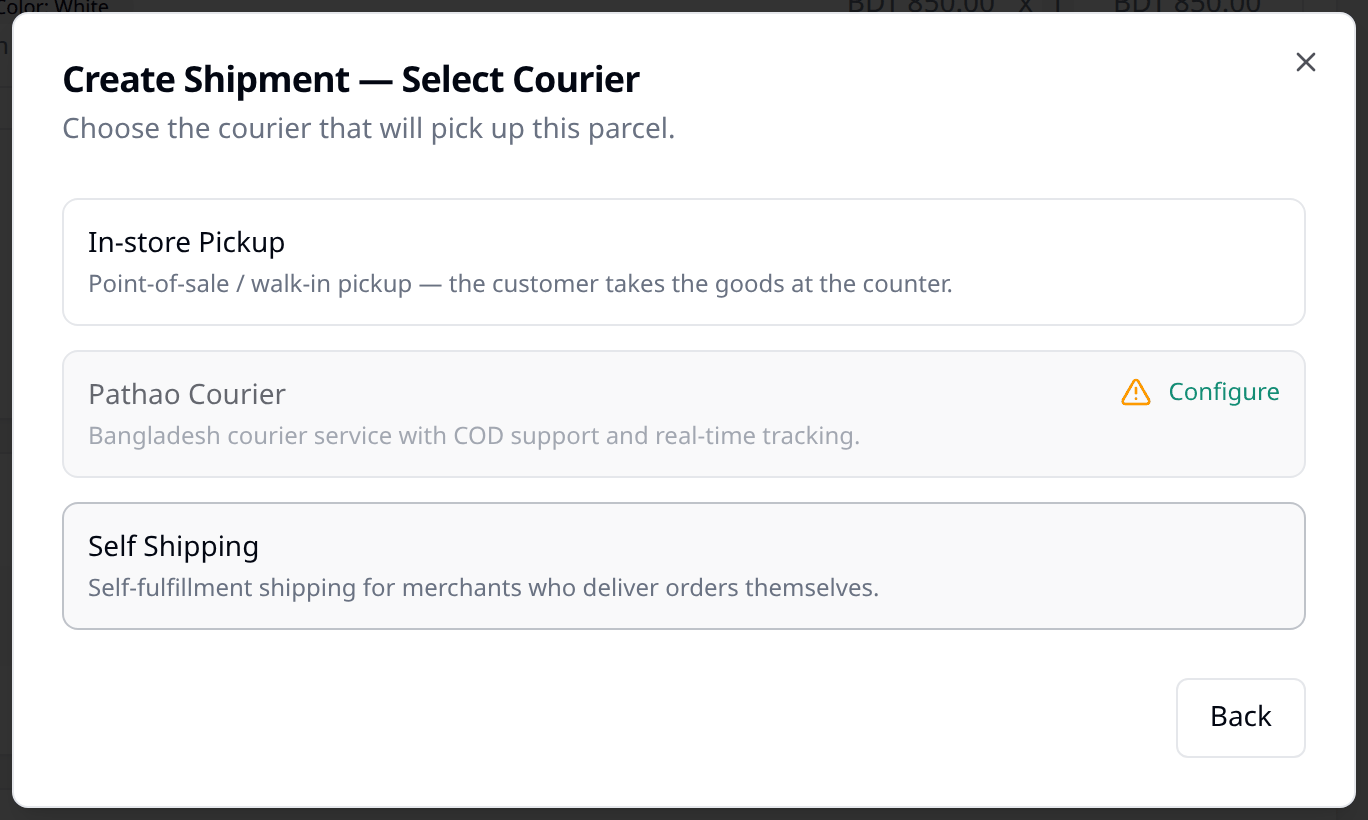
Choose how it will be delivered. Pick from the shipping apps you have installed — a courier company, Self Shipping, or In-store Pickup. Apps that are not set up yet are disabled, with a link to finish setting it up.
Fill in the parcel's details. Who is receiving it, their address, and how much cash to collect if they are paying on delivery. The form differs slightly by courier.
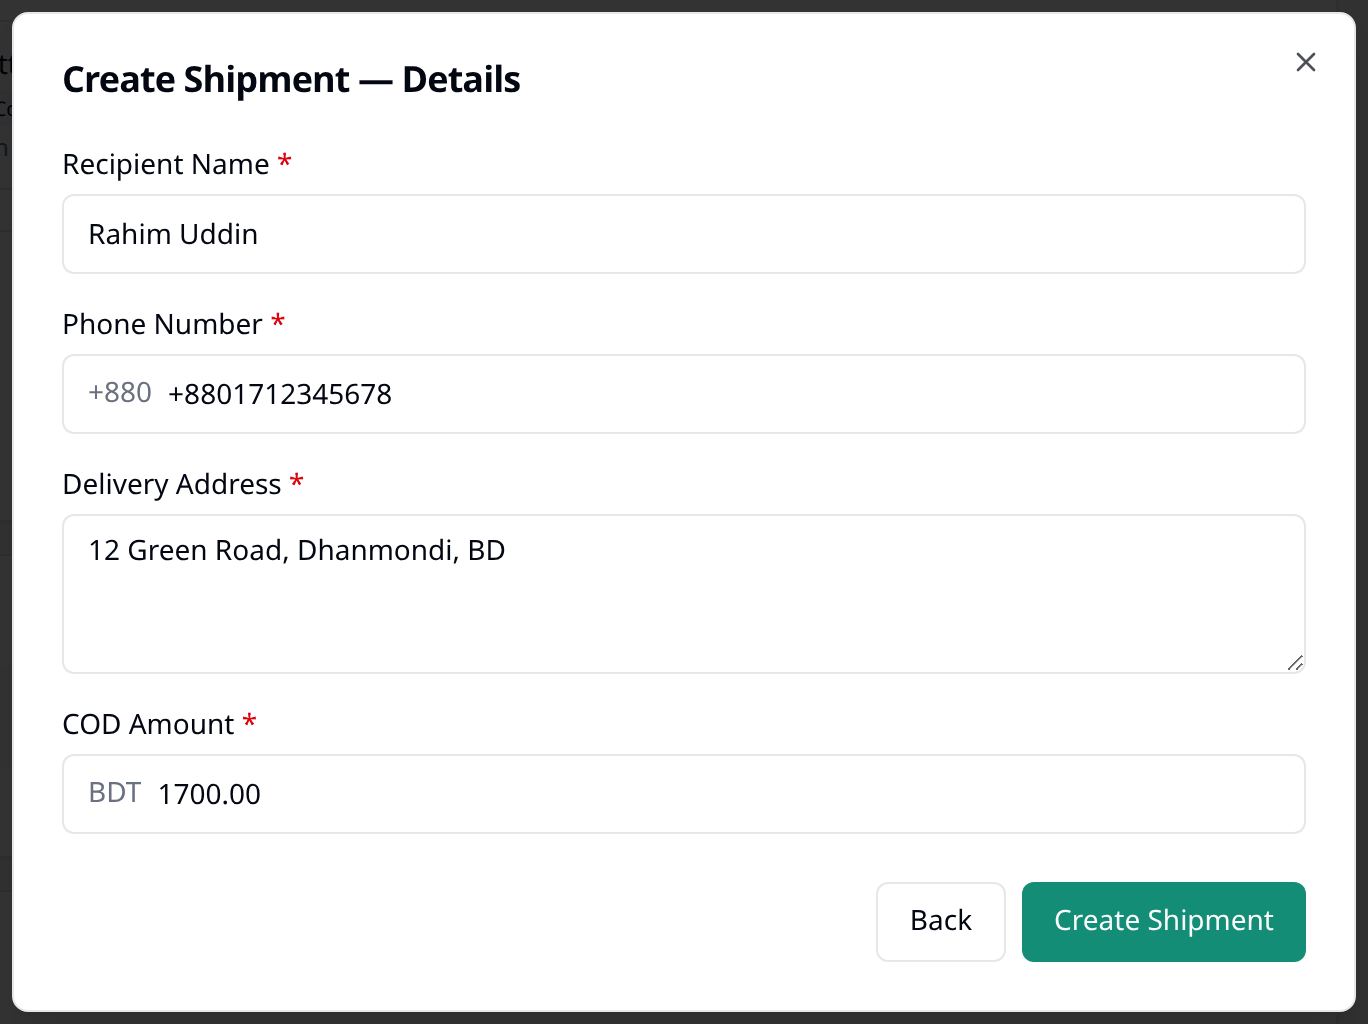
Press Create Shipment on the last step to send the parcel, and it appears in the Shipments panel.
Tracking a shipment
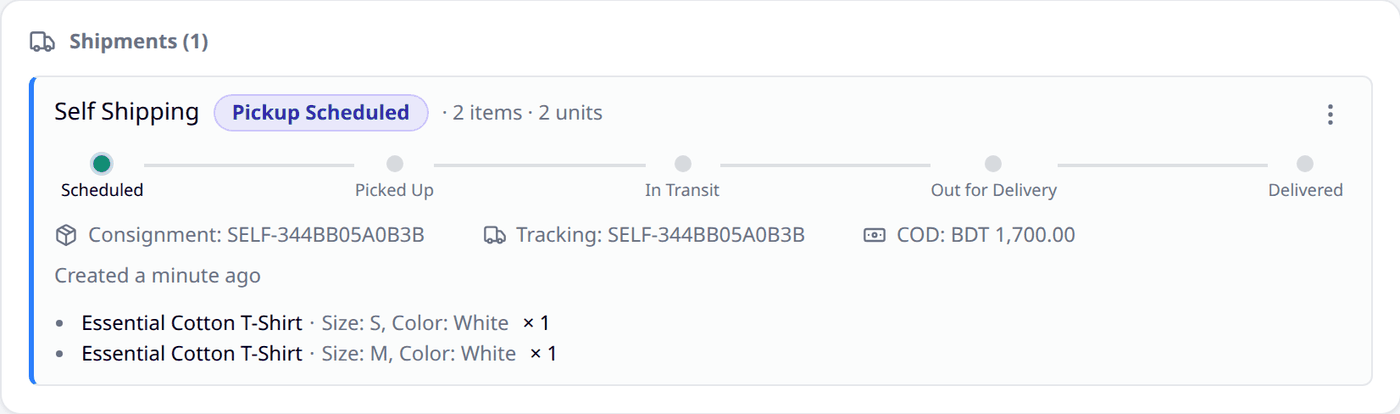
Each shipment shows its progress: Scheduled → Picked Up → In Transit → Out for Delivery → Delivered. This updates automatically as the courier reports back. Press the refresh icon beside it to check the live status.
If the tracking status looks wrong or has stopped updating, choose Set Status Manually from the three-dot menu beside the shipment, pick the correct status, and write a reason. Biponix keeps a record of the change.
Cancelling a shipment
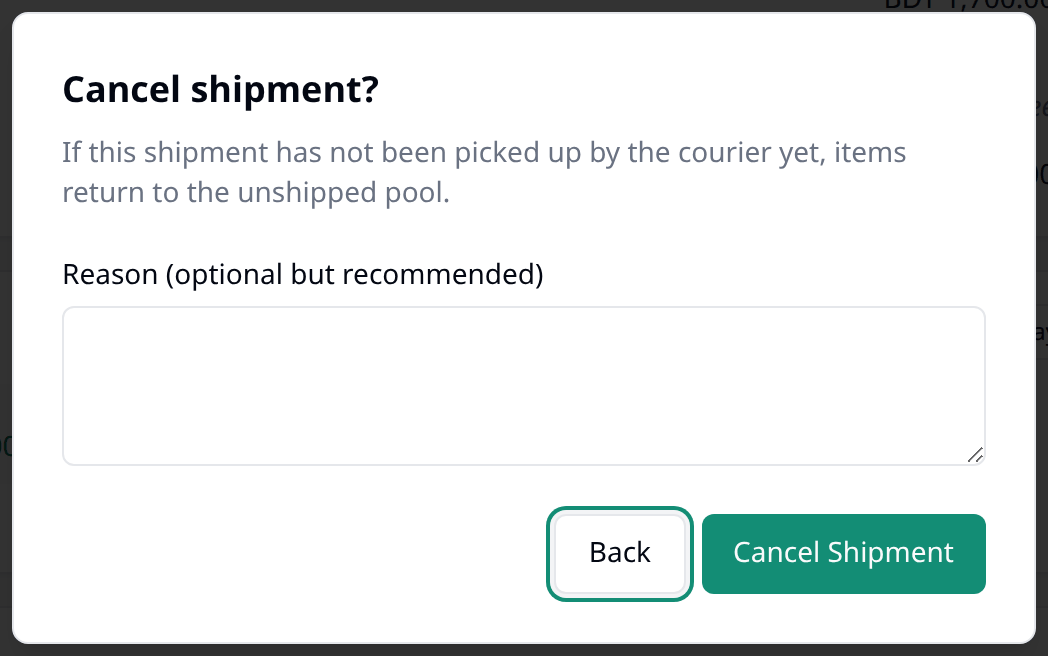
Choose Cancel Shipment from the three-dot menu. Biponix asks for a reason, then makes the shipment's items available to ship again, so you can send them another way.
Cancelling stops working once it is picked up
Once a courier has picked up a shipment, Cancel Shipment is no longer available. If the shipment is later returned, use Resolve Return instead.
Fixing a mistake after the fact
Once a shipment is Delivered, Cancelled, or its return is resolved, it locks. Nothing on the shipment can be changed until you unlock it. Choose Unlock for Correction from the three-dot menu and write a reason — this makes Set Status Manually and Resolve Return available on the shipment again.
When a shipment is returned
Occasionally a parcel is returned — the courier could not reach the address, or the customer refused it. Biponix shows this shipment's status as RTO. Choose Resolve Return and say what happened to the parcel:
- Received back (sellable) — it goes back on your shelf, returned to your stock again.
- Received damaged (unsellable) — it does not return to your stock.
- Lost in transit — it does not return to your stock.
A reason is required for damaged or lost parcels. For parcels received back, it is optional. Resolving a return does not automatically refund the customer — instead record a refund on the order's Payment panel if it applies.
If every shipment on an order ends up resolved this way with nothing delivered, Biponix cancels the order.
Printing a shipping label
Alongside the Receipt you already know, the print menu offers a shipping label in three sizes — 2x3, 3x3, and 3x4 — to match whatever your courier or printer expects.