
Appearance
POS
POS is short for point of sale — the screen for selling to someone standing in front of you at your shop's counter, not one buying through your storefront. You put in what they picked, take the money, and complete the sale.
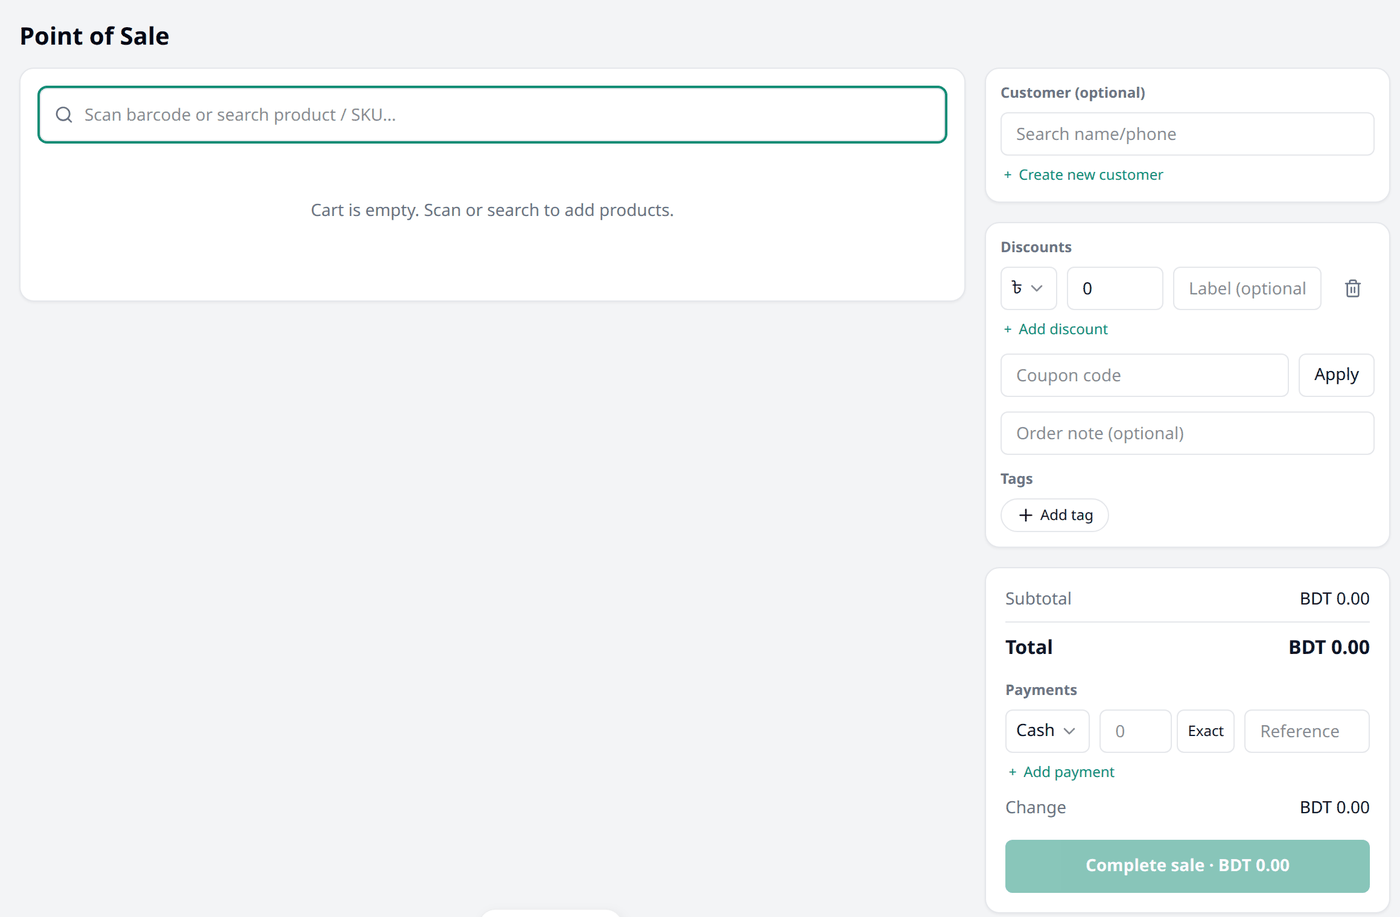
Open POS from the menu. The screen itself is headed Point of Sale.
Setting up
Two things you need before your first sale.
1. Install the In-store Pickup app. Go to Apps in the menu, find In-store Pickup, and press Install. This sets your shop up to accept POS sales. The POS screen also offers you an Open In-store Pickup button that takes you straight there.
2. Add a payment method. Go to Settings → Payments and press Add method under Payment methods. Name it after how you actually take the money — Cash, bKash, whatever you use. Add one for each way you take payment.
Two boxes when you add a payment method
Cash drawer method means this method can give change back. Without it, a method can only take the exact amount. Set as default means it is pre selected for you when you open POS, which saves a press on every sale. See Payments in Settings for everything else you can do with a payment method — reordering, archiving, and so on.
Making a sale
1. Find the product
The search box sits at the top left, ready for you to type. It searches through product names, SKUs and barcodes.
Each result is one variant, with its stock beside it, so Red and Green variants of the same saree appear as separate rows. Press one to add it.
Pro tip
A barcode scanner works here with no setup required. A scanner simply enters what it reads into whichever box is active. Keep the search box selected, and each scan adds the item straight to the sale. Biponix puts you back in the search box after every item, so you can scan a whole basket one after another.
2. Adjust the sale
- Adding the same item again increases its quantity, rather than adding a new row.
- Each row has − and + around its quantity, and a bin button to remove it.
- Customer (optional) links this sale to a customer. You can leave it empty and the sale is recorded against a walk-in customer.
- The Add discount button takes an amount off, either as a fixed amount or a percent. You can add two.
- Coupon code is for coupons your shop offers.
3. Take the money
Your payment methods are listed under Payments, with your default one already chosen.
Type what you received into the amount box, or press Exact to fill in the full amount owed.
- Change shows what you owe them back.
- Due appears instead if they have not paid the full amount.
- The Add payment button adds a second row, so a customer can split their payment across multiple methods. You can use up to five.
4. Finish
Press Complete sale. The button shows the total, or the amount still due if the sale is not fully paid.
The receipt opens in your browser's print window, so any printer works. Once you close it, the screen resets for your next customer.
Pro tip
Hold Ctrl and press Enter to complete a sale without reaching for the mouse. On a Mac, hold Cmd instead.
A counter sale is completed the moment you make it
This is the part that might surprise merchants who have been using Biponix for online sales. A counter sale does not need confirming or shipping. A POS sale is recorded as Completed and Paid the moment you complete it. Your On Hand count goes down immediately, rather than the stock being held as Reserved like online orders.
If the customer did not pay in full, the sale is still finished, but it is marked Partially Paid and the rest is recorded as owed.
POS lets you sell past your stock count
If your screen shows two and you can see three on the shelf, you can still add the third — POS just warns you when you do. The goods are in your hand, so Biponix trusts you over the number. Adjust the count afterwards on the Inventory screen.
Finding counter sales later
Every counter sale appears in your Orders list alongside every other order, with POS as its source. You can filter the list by source to see only counter sales.