
Appearance
Discounts
A Discount is a code that can be applied during order placement to reduce the price. Open Discounts from the menu to see the discounts in your shop.
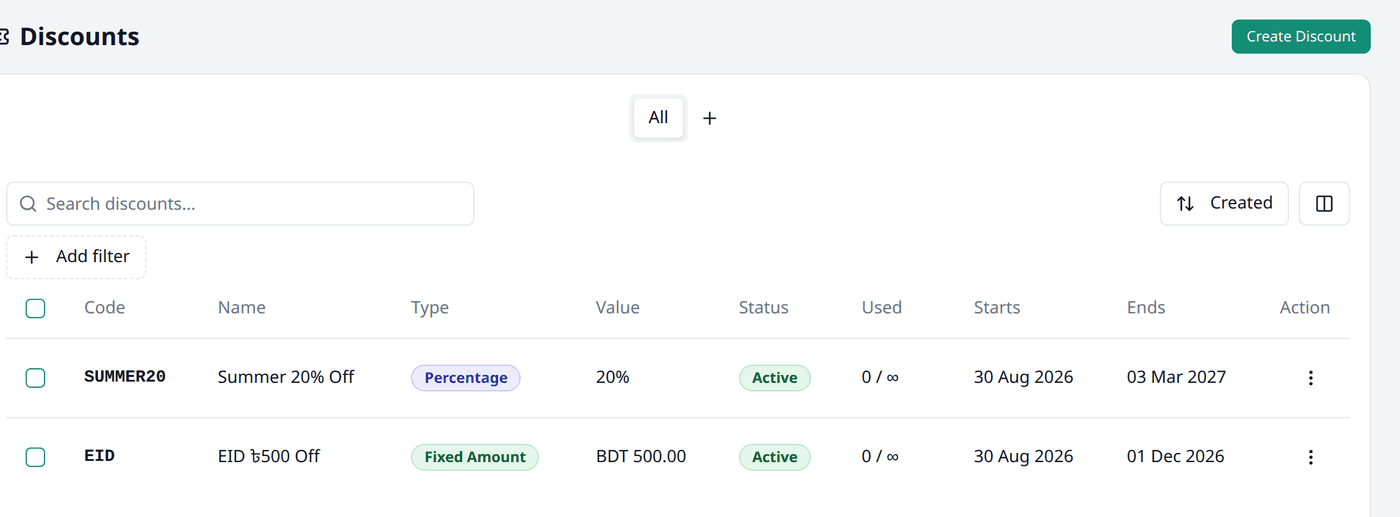
The list
| Column | Description |
|---|---|
| Code | The coupon code, pressing it opens the discount's edit screen |
| Name | The discount's name |
| Type | Its type — Percentage or Fixed Amount |
| Value | Its amount |
| Status | Its active status — Active, Scheduled, Expired, or Inactive |
| Used | How many times it has been used, out of its usage limit |
| Starts | When it becomes available |
| Ends | When it expires. No end date for discounts without an expiry date |
| Action | Covered below |
One more column, Created, is hidden by default. You can unhide it from the columns button.
What each status means
Active is working right now. Scheduled has not started yet. Expired has passed its end date. Inactive is switched off. Biponix works these out for you — you only set the dates and the Active switch.
Search and filters
This list works the same way as every other list in your dashboard. Working with lists explains searching, filtering, sorting, columns and views in full.
Search lets you find a discount by its code or its name.
Here are the available filters for this screen:
- Status — filter the list by whether it is Active, Scheduled, Expired, or Inactive.
- Type — filter the list by Percentage off order or Fixed amount off order.
- Created — a date range for when the discount was created.
Actions
Each row has an action button. These are the actions available there:
- Edit — open the discount to make changes.
- Copy code — copy the discount code to your clipboard.
- Activate or Deactivate — turn the discount on or off.
- Delete — remove it completely. Only works if it has never been used; use Deactivate instead to stop new redemptions on one already used.
Bulk actions
Tick rows the way Working with lists describes, then press Bulk actions for:
- Activate — turn on every selected discount.
- Deactivate — turn off every selected discount.
- Delete — remove every selected discount, skipping any that has already been used and telling you which ones were skipped.
Creating a discount
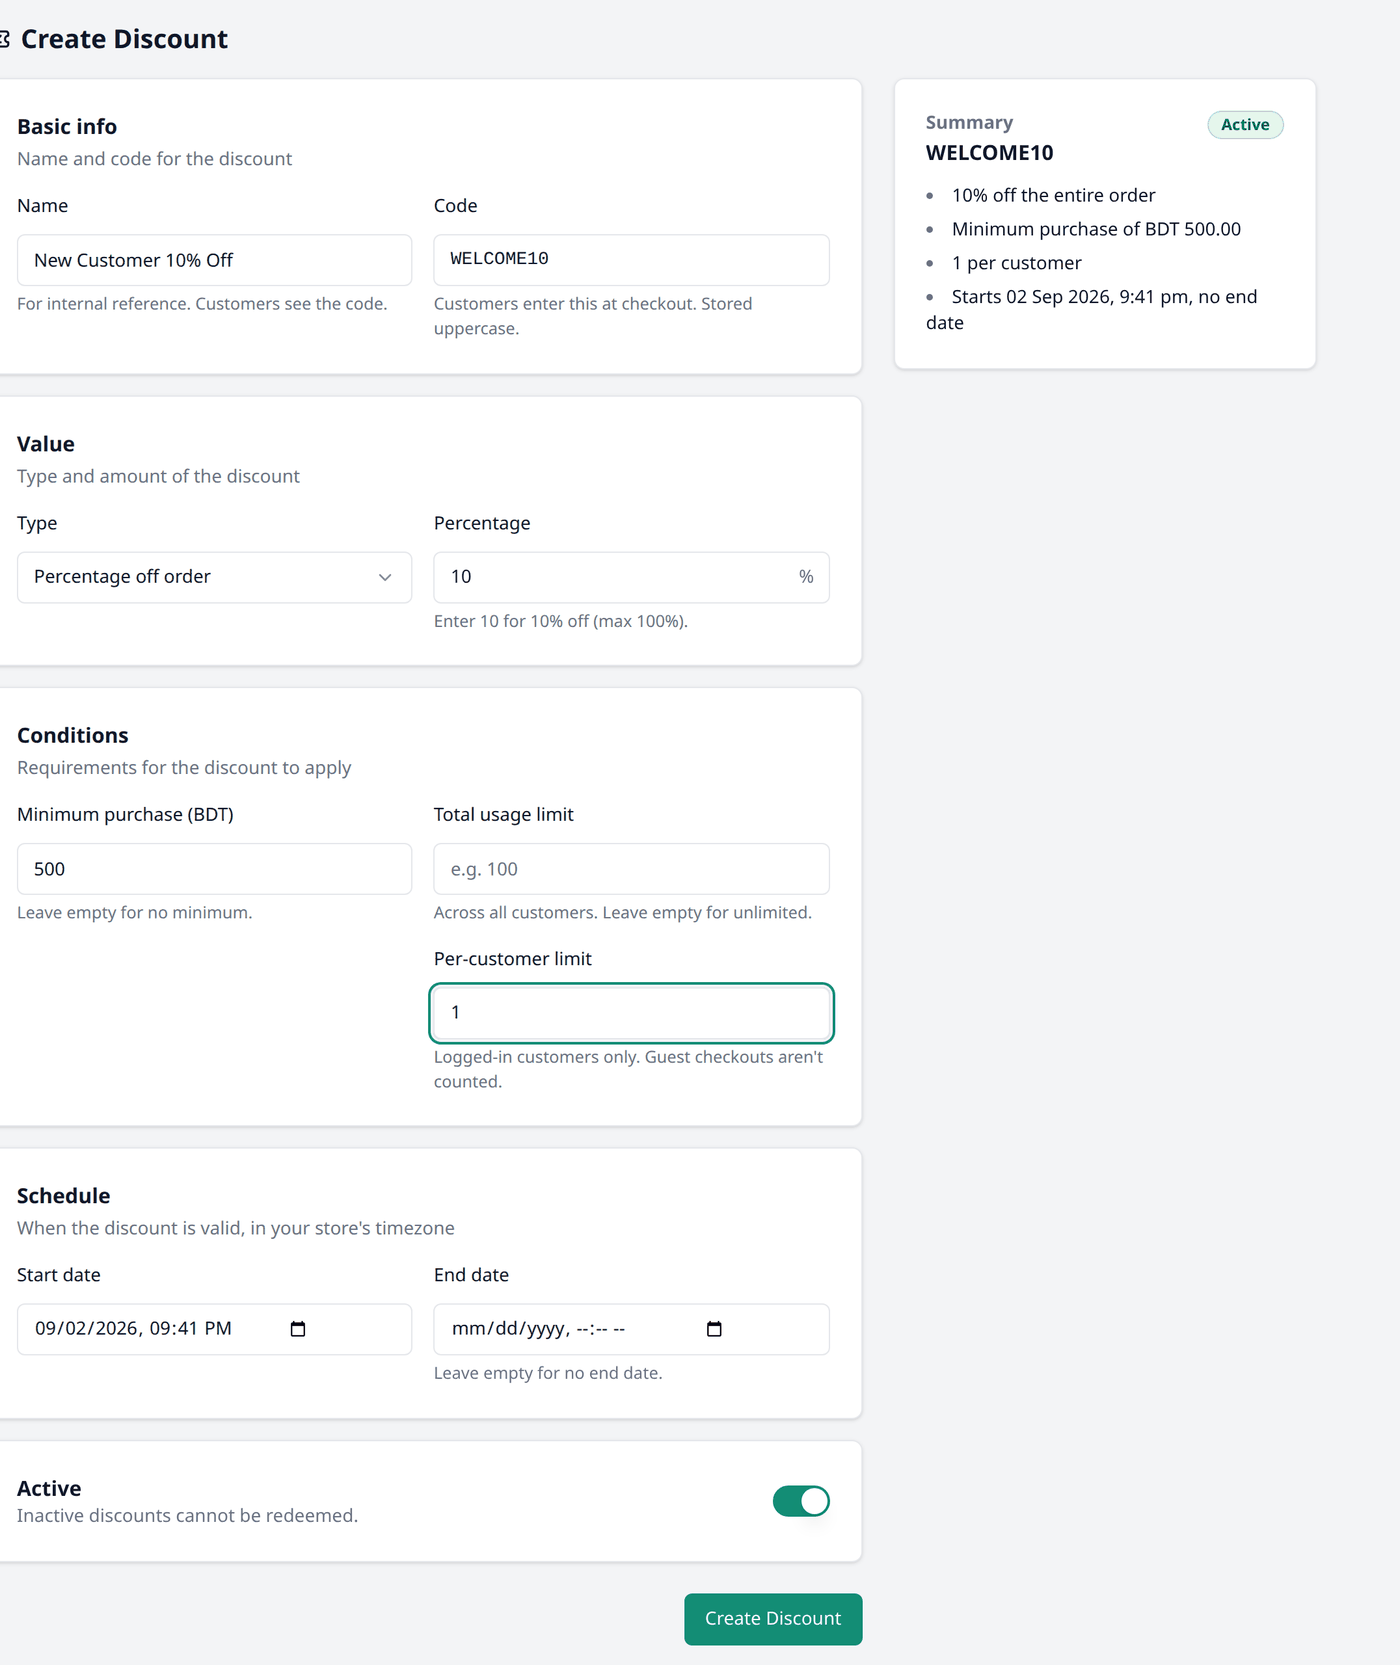
Press Create Discount, then fill in:
Basic info
- Name — for your own reference. Customers never see it.
- Code — the code to apply the discount. Saved in capital letters.
Value
- Type — Percentage off order or Fixed amount off order.
- Amount — the amount itself, as a percentage or a flat number depending on the type.
Conditions
- Minimum purchase — minimum order total for the discount to be applicable. Leave empty for no minimum.
- Total usage limit — how many times this discount can be applied. Leave empty for unlimited.
- Per-customer limit — how many times this discount can be applied per customer. Only applicable for logged-in customers, not guest checkouts.
Schedule
- Start date — when the discount will be available.
- End date — when it will expire. Leave empty for no end date.
Finish with the Active switch, then press Create Discount.
Using a discount on an order
On an order's form, type the code in the Add discount box and press Apply coupon. See Order processing for more.