
Appearance
Working with lists
Lists are one of the main parts of your dashboard. Products, Orders, Customer, Inventory, Discounts and Collection all show you a list. They hold different things, but they all work the same way, with the same search box, the same filters and the same buttons in the same places.
So this page is worth your time. Learn it once here, on the product list, and you have learned every other list in your dashboard.
This page is longer than most
It is long on purpose, because it covers a lot of screens at once. Read the part you need and come back for the rest later.
Searching
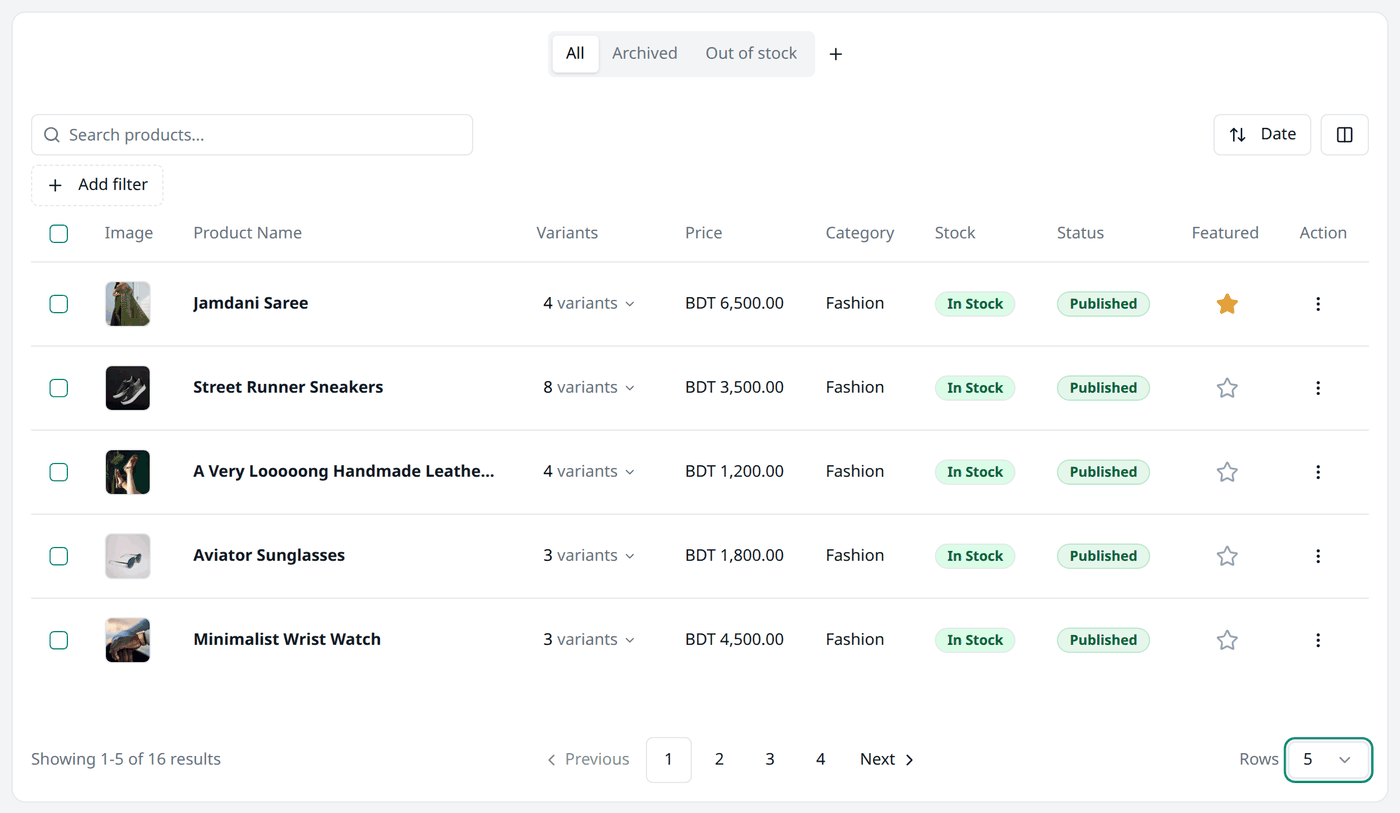
The box on the left searches the list you are looking at. On the product list it says Search products..., on the order list Search orders..., and so on.
Type and wait a moment. The list updates on its own, there is no button to press. To go back to everything, empty the box again.
Filters
A search finds words. A filter narrows the list by something the list already knows — a status, a category, a price.
Press Add filter and pick one. The product list offers Status, Category, Stock Status, Date, Price and Stock count. Other screens offer their own.
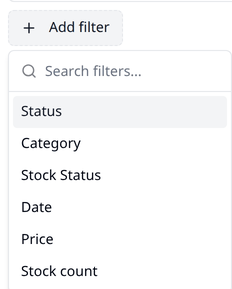
Filters are not all the same shape, because they do not all do the same job:
- Multi-select, such as Status. Tick as many as you want, then press Apply. Clear empties your choice.
- Single select, such as Stock Status. Pick one from the list. The first item is always All, which means no filtering.
- Calendar range, such as Date. Pick a first day and a last day to cover a period, then press Apply.
- Numbers range, such as Price — a Min box and a Max box.
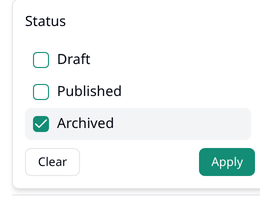
Once set, a filter sits above the list as a small tag: Status: Archived. The × on the tag removes that one filter. Clear all, beside it, removes every filter at once.

How several filters work together
Add more than one and a row has to match all of them. For example a product only shows if it is Archived and in Fashion.
Ticking several boxes in a multi-select filter works the other way. Tick Draft and Archived and you get both — a row matching either one.
Sorting
The button near the top right is the sort button, and it is labelled with whatever the list is sorted by right now. On the product list that is Date to begin with, meaning newest first.
Press it and pick a different column. Picking the active column again flips the order — smallest first becomes largest first. You can also press a column heading in the list to sort by it.
A list is sorted by one column at a time, so choosing a new one replaces the old.
Choosing which columns you see
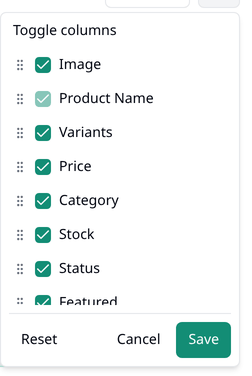
The small button beside the sort button opens Toggle columns.
Untick a column to hide it. Drag a row by the handle (⋮⋮) on its left to move a column earlier or later. A few columns are fixed and cannot be unticked — on the product list, Product Name is one — so their boxes are disabled.
Save keeps your choice, Cancel throws it away, and Reset puts every column back the way it started.
Columns are remembered on this computer only
Unlike a view, your column choice is not saved to your shop. Sign in on a different device and you get the columns in their initial setting. Your team does not see your choice either.
Views
Setting the same filters every morning is a waste of your time. A view saves them for you.
Above every list is a row of tabs. All is the plain list with nothing applied. Beside it sit your saved views, and then a + button for making a new one.
A view remembers four things: what you searched for, which filters you set, how the list is sorted, and which columns you chose.
A view is also the easiest way share the same list with someone else. Everyone in your shop sees the same tabs, so you can tell a colleague to open a view you added and they see what you see.
Views are shared with everyone in your shop
A view is not private. Everyone who works in your shop sees the views you make, and any of them can rename or delete yours. Give views names your team will understand.
Making a view
- Set the list up the way you want it — filters, sort, columns, all of it.
- Press +.
- Type a name in the Save View box and press Save.
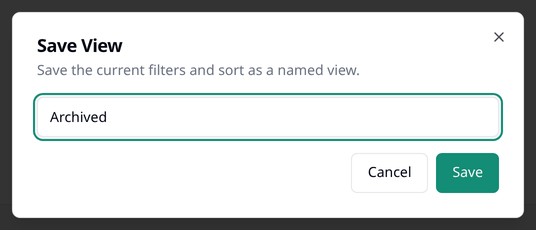
Your view appears as a new tab. Press it any time to get that list back.
Changing a view
Press a view tab, then change anything — add a filter, sort differently, hide a column. A small dot appears next to the view name. The dot means this view has changes you have not saved yet.
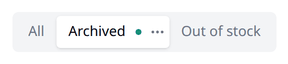
The ⋯ button beside the name opens what you can do about it:
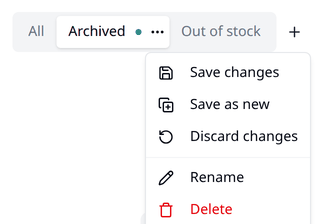
- Save changes — keep the changes in this view.
- Save as new — leave this view alone and make a second view from what is on screen. This is how you copy a view.
- Discard changes — put the view back the way it was saved.
- Rename — give the view a different name.
- Delete — remove the view.
Save changes, Save as new and Discard changes only appear while there is something unsaved. Rename and Delete are always there.
Leaving a view with unsaved changes
Press another tab while the dot is showing and Biponix asks first — Discard unsaved changes? Cancel keeps you where you are, so you can save. Discard throws the changes away and moves on.
Deleting is different. Biponix asks once, and after that the view cannot be brought back.
An example: finding your archived products
Archived products leave your storefront and leave the product list as well. That is by design, but it means you need a way back to them. This is the type of job a view is made for, and it is worth doing once now.
- Open Products.
- Press Add filter, then Status.
- Tick Archived, then press Apply. The list now shows only archived products.
- Press +.
- Type Archived as the name, then press Save.
That is it. From now on there is an Archived tab at the top of your product list, and your archived products are one press away.
Later on you may want them sorted differently. Press the Archived tab, press the sort button, and choose the order you want. The dot appears. Open ⋯ and press Save changes, and the view keeps the new order too.
Working on many rows at once
Some lists let you tick rows and act on all of them together. Products, Orders and Discounts work this way.
Tick the box at the head of the list and every row on the page is ticked. A grey bar appears above the list telling you how many: 10 selected. Bulk actions beside it holds what you can do to them.
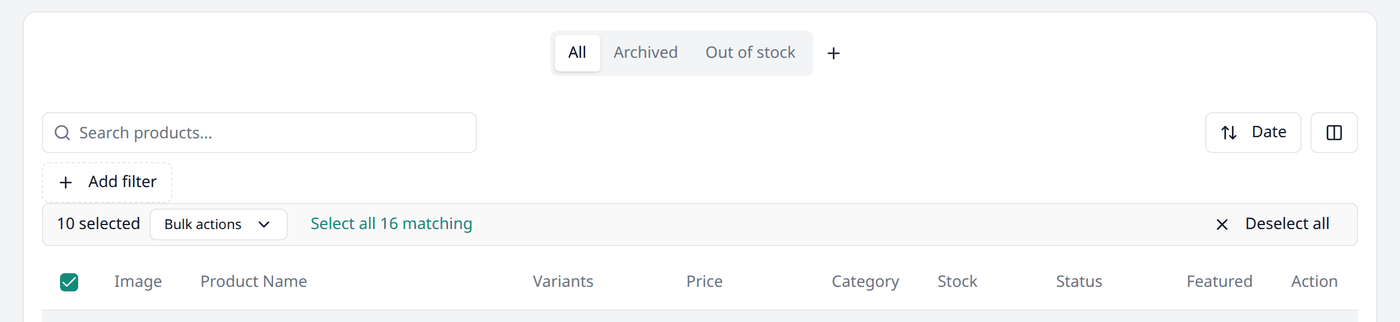
Select all 16 matching goes further. It picks everything the current filters find, not only the rows on this page. Deselect all clears them all.
On Products, Orders and Discounts your ticks survive moving to the next page, so you can gather rows from several pages before acting on them. Changing a filter or the search clears them.
Long lists
At the bottom sits a line like Showing 1-10 of 16 results, with Previous and Next and the page numbers.
Rows on the right sets how many you see at a time — 5, 10, 25 or 50. Like your columns, this is remembered on this computer only.
When the list comes back empty
No results found with Try adjusting your search or filters underneath means nothing matched.
Most often a filter is still set from earlier. Look above the list for filter tags and press Clear all, or press the All tab to go back to the plain list.